Reframing older iPads
I’m not sure about you, but we’ve ended up accumulating a stable of older iPads over the years. Whether they were used to placate children on long drives or are just relics from an earlier age of computing, I’ve always felt like they deserved to be used for more than sitting as e-waste in a cupboard or at the bottom of a drawer.
Alongside this, another problem I’ve been thinking about for ages is how to pluck the tens of thousands of family photos we’ve collected over the years from the depths of my NAS to be displayed somewhere they can be appreciated.
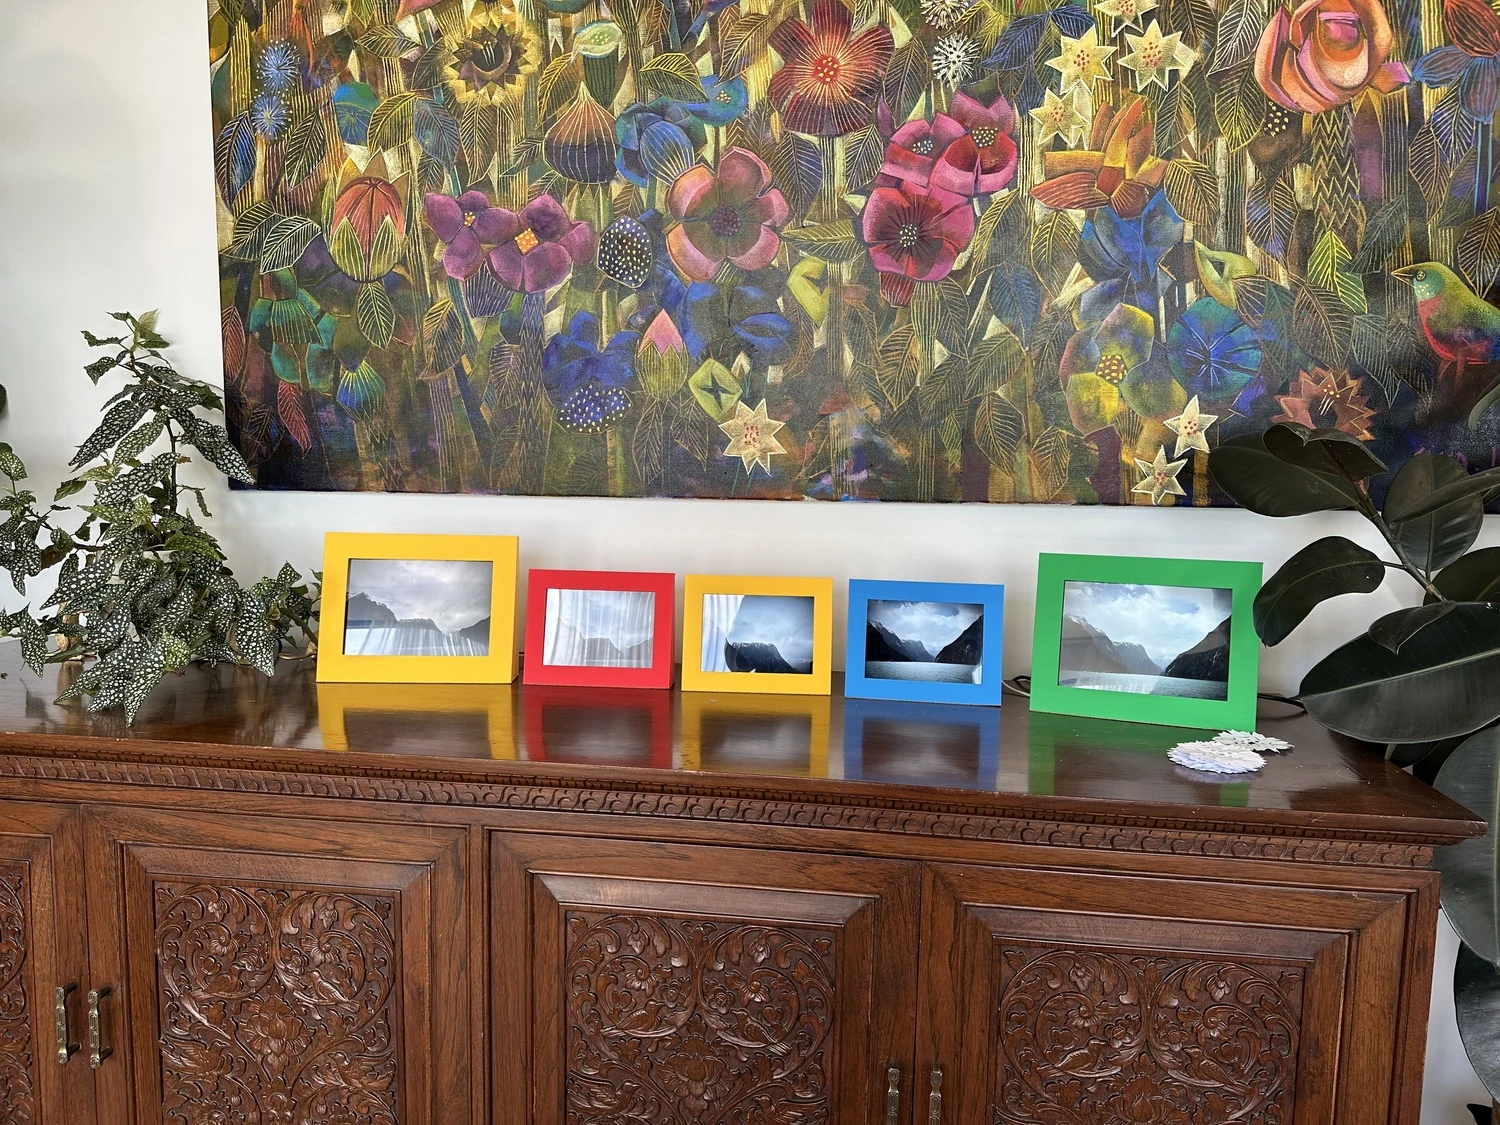
Armed with a 3d printer, my solution to both these problems has been to design a series of iPad stands to hold the various sizes and shapes of iPads that I've found around the house or been fortunate enough to have donated by friends with similar e-waste caches.
I’m really happy with the results, and you can download the frames on Maker world. They currently work for ~iPad Mini 2's and ~iPad 5's because these are the form factors I ended up with. There's a bit of give in them but be sure to measure before printing.
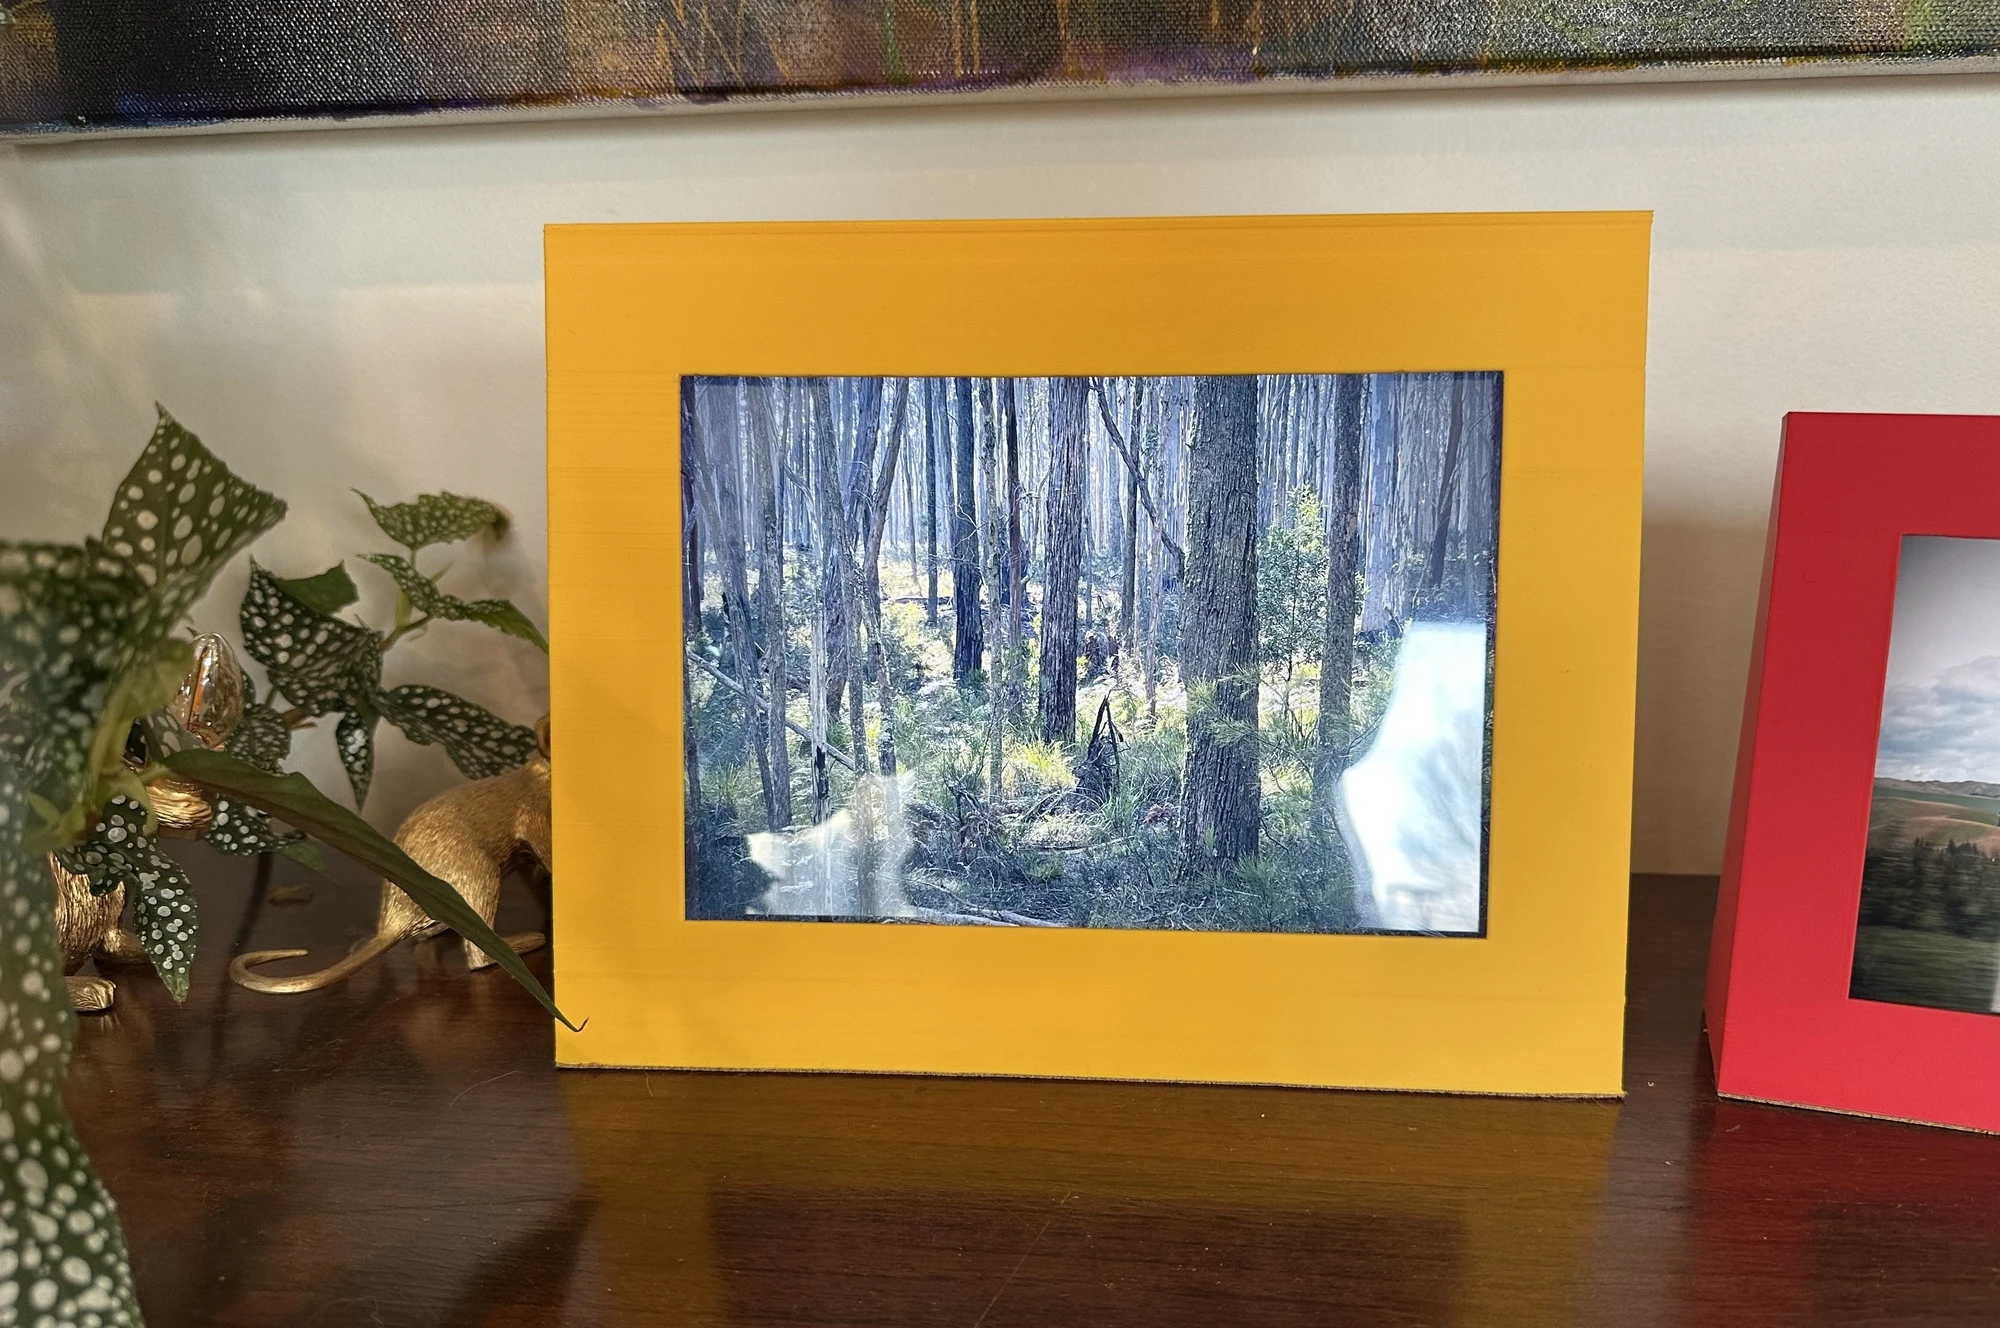
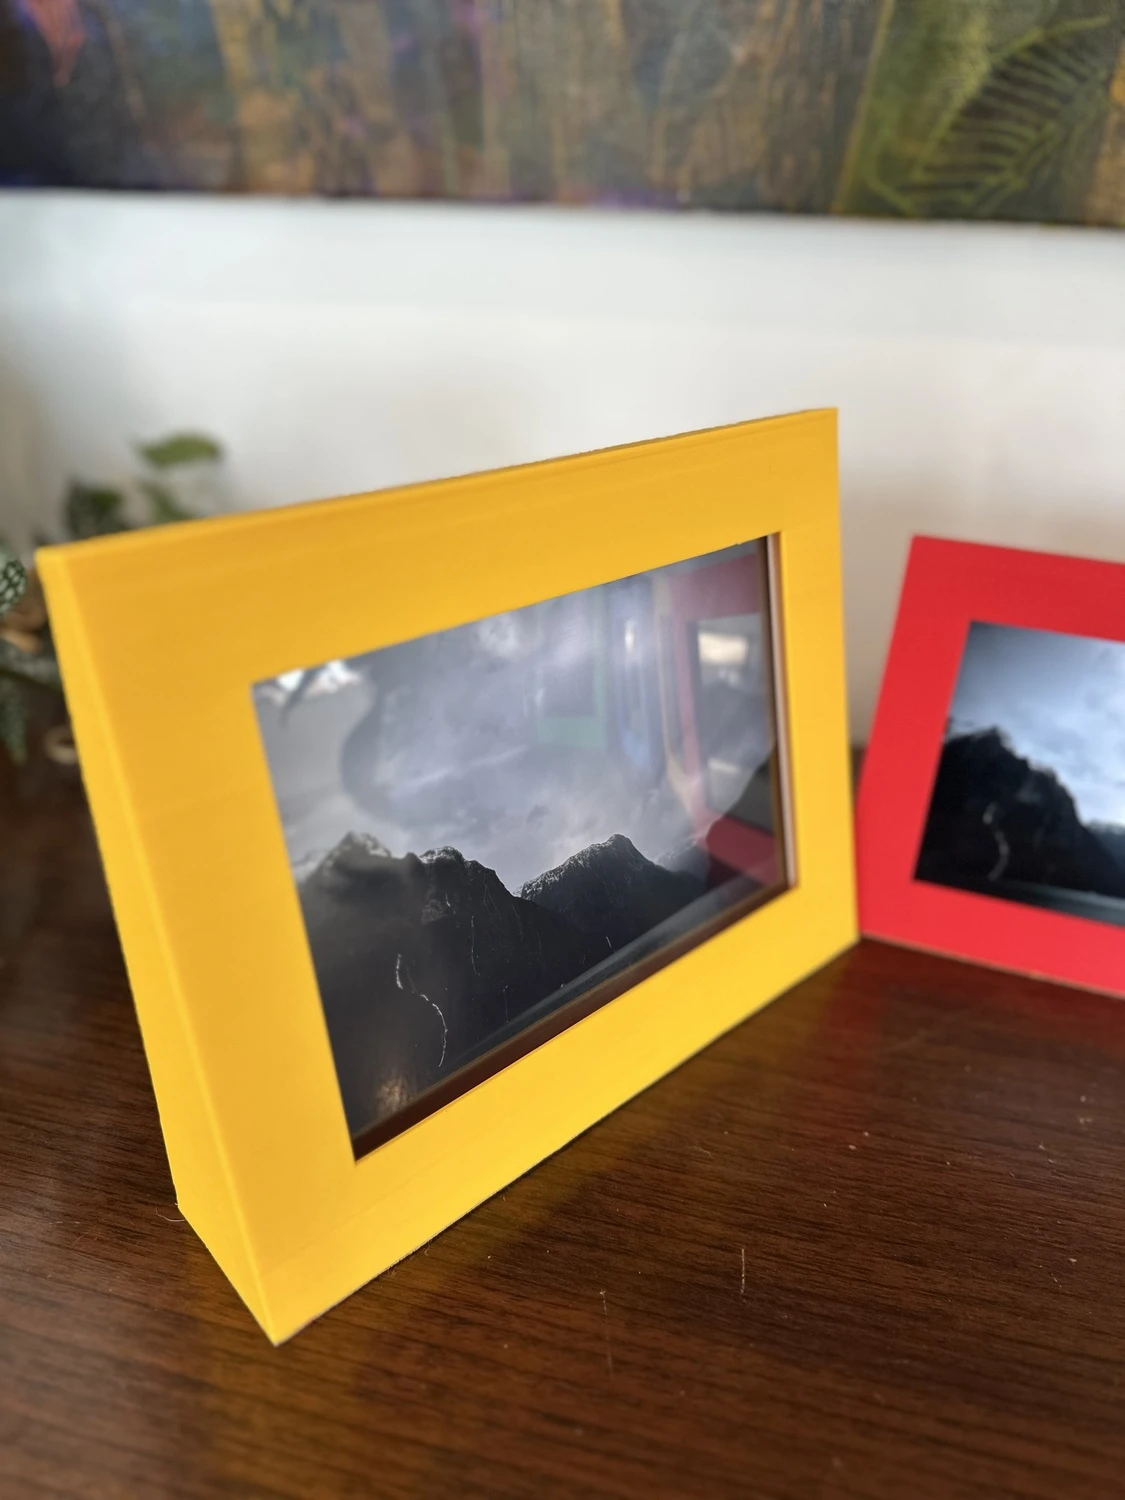
For the second part of my challenge, I turned to immich and some vibe coded software. Immich is a fantastic alternative to iCloud or Google Photos, but the issue I faced is that older iPads firstly can't install apps and don't have the latest browser software. This meant that I needed to use the Immich API to retrieve and show photos the way I wanted to. Fortunately for me, that meant I could also add some features I thought were cool. More on that below.
Making the frames
I used Shapr3d to model the frames. It’s an excellent and intuitive application for 3d modelling and also for planning out projects.
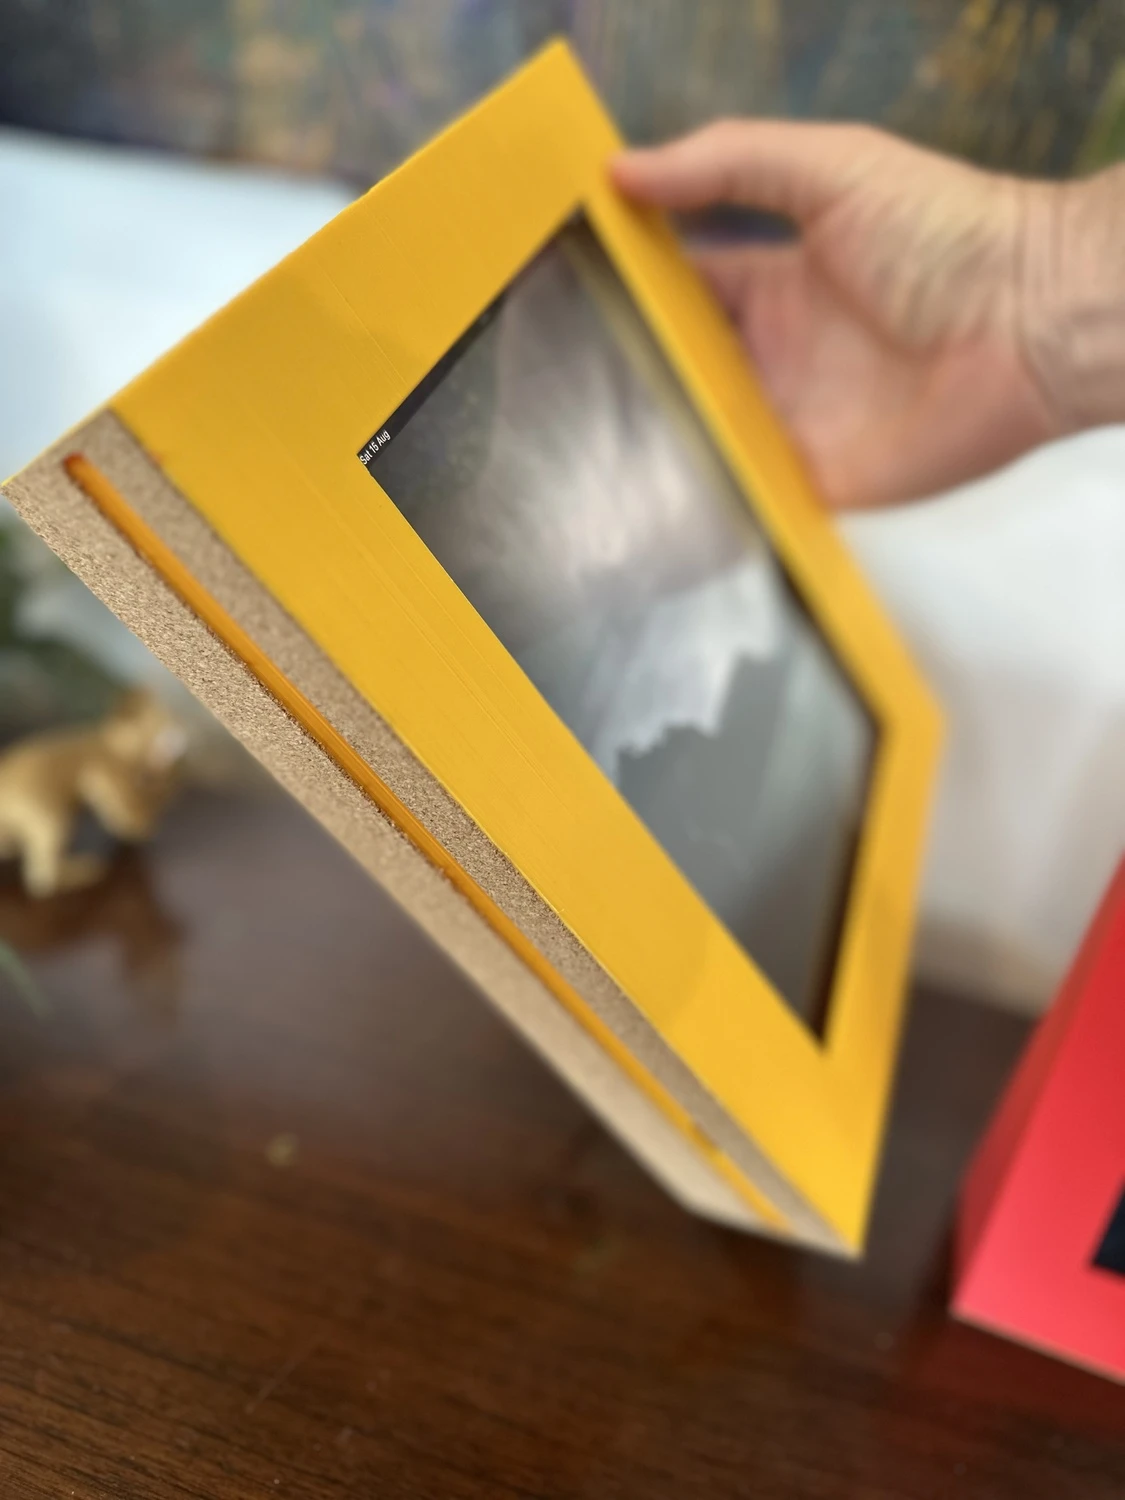
My goal with the model was to make a very simple shape that could be printed on a Bambu lab X2D. I started off just trying to get the caddy shape correct - initially I was going to slide the iPad in from the side, but then this would leave me with an ugly gash on the side and that instead I could push the iPad up through the bottom, then have it drop into a well-sized tray.
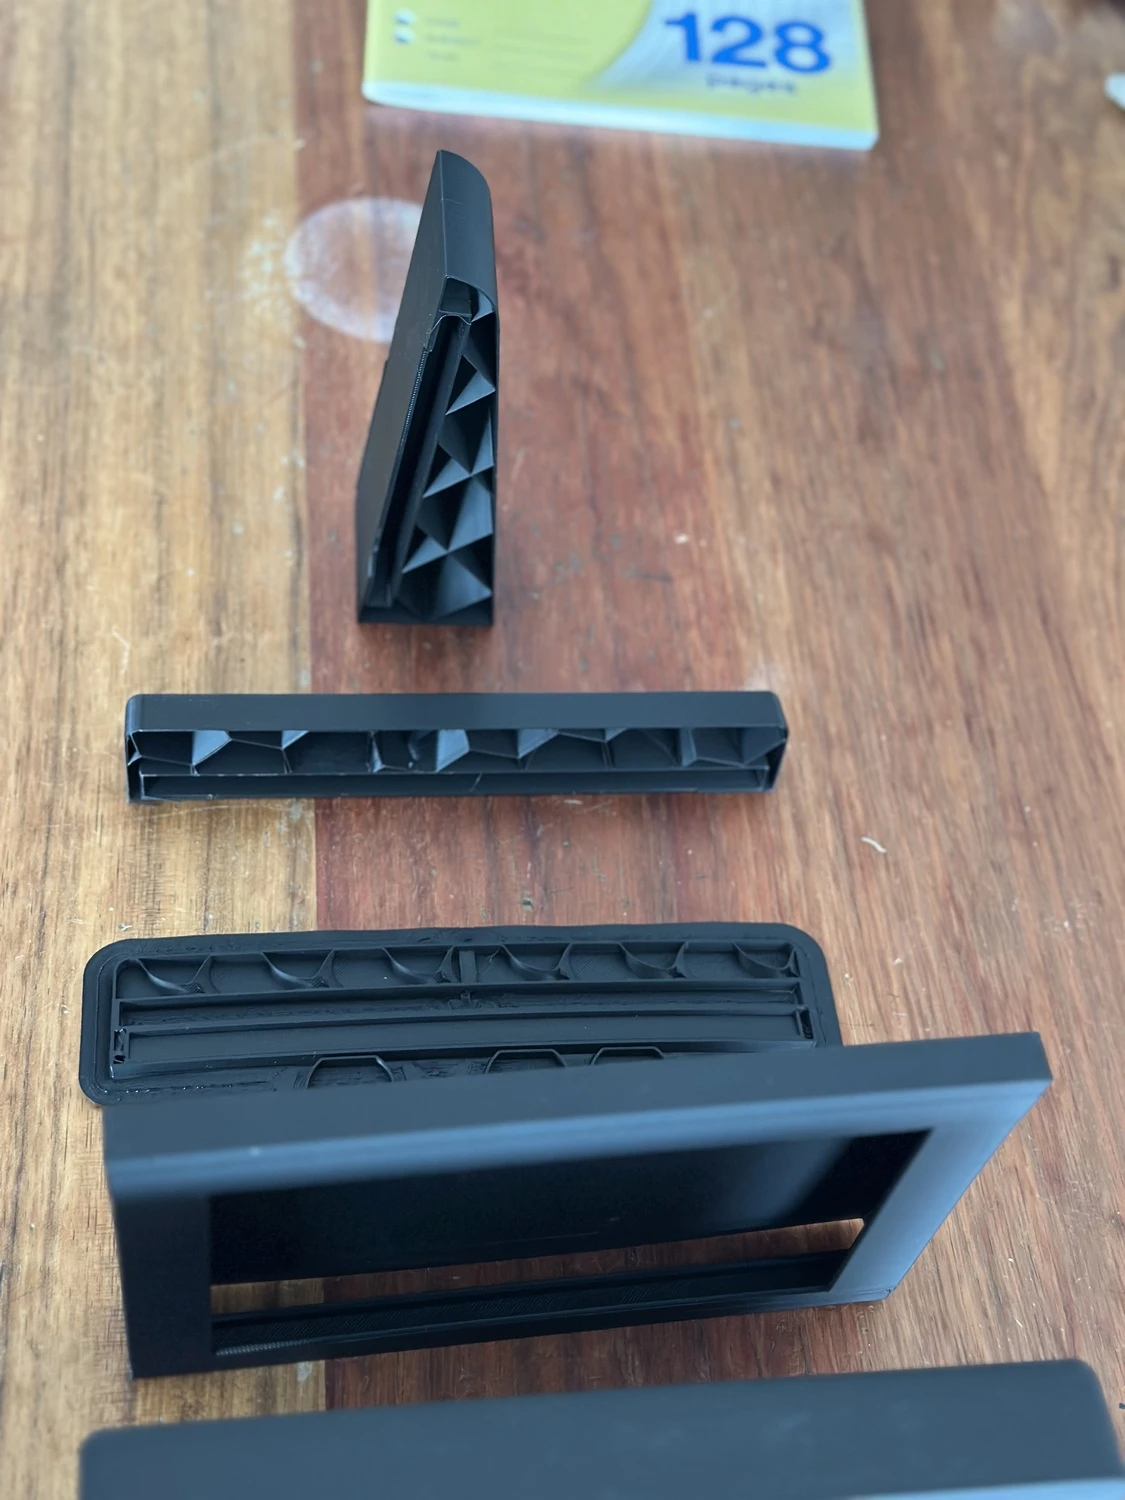
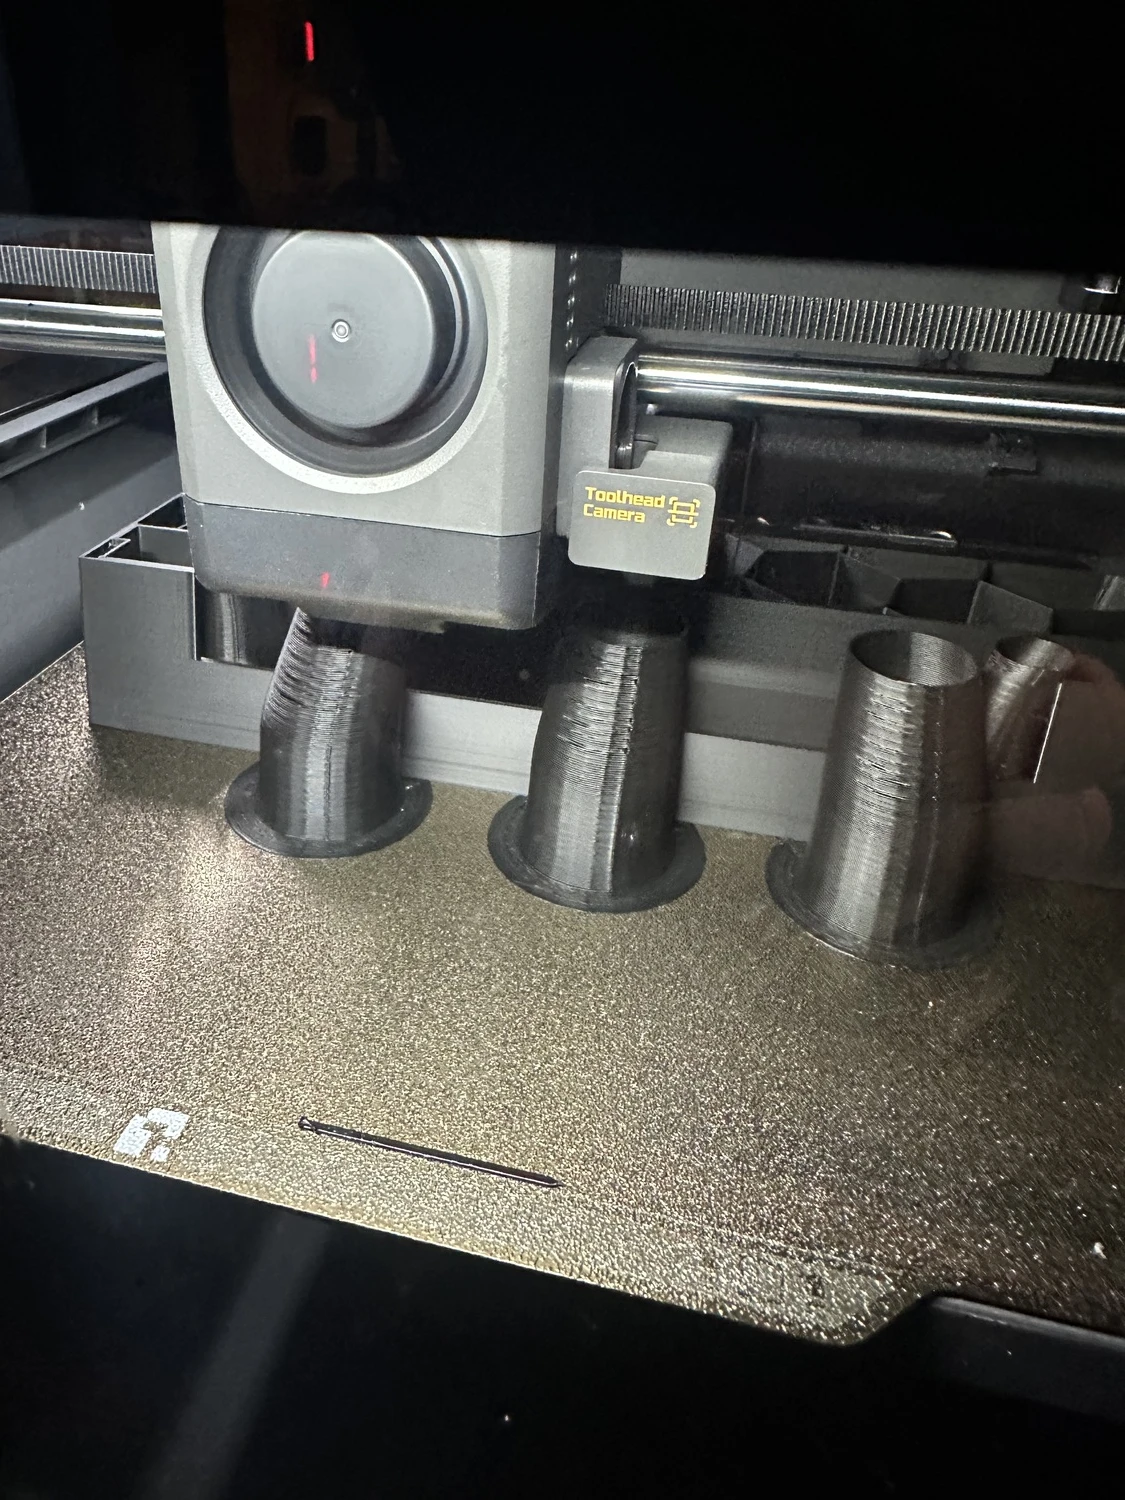
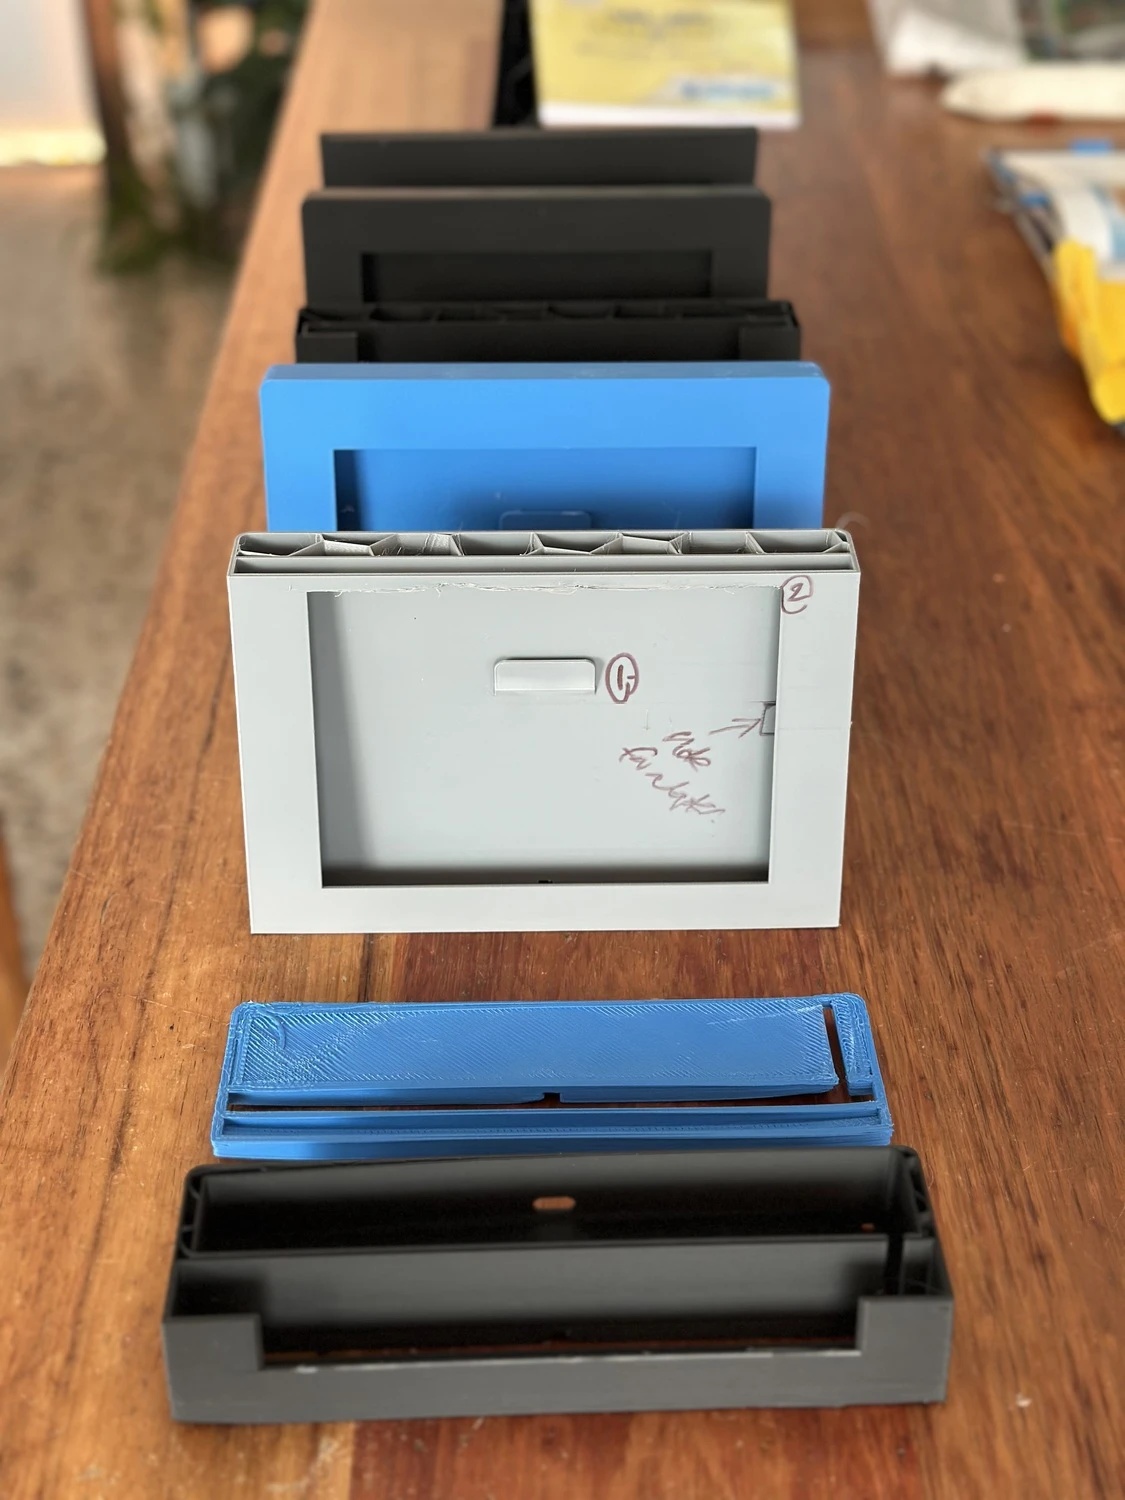
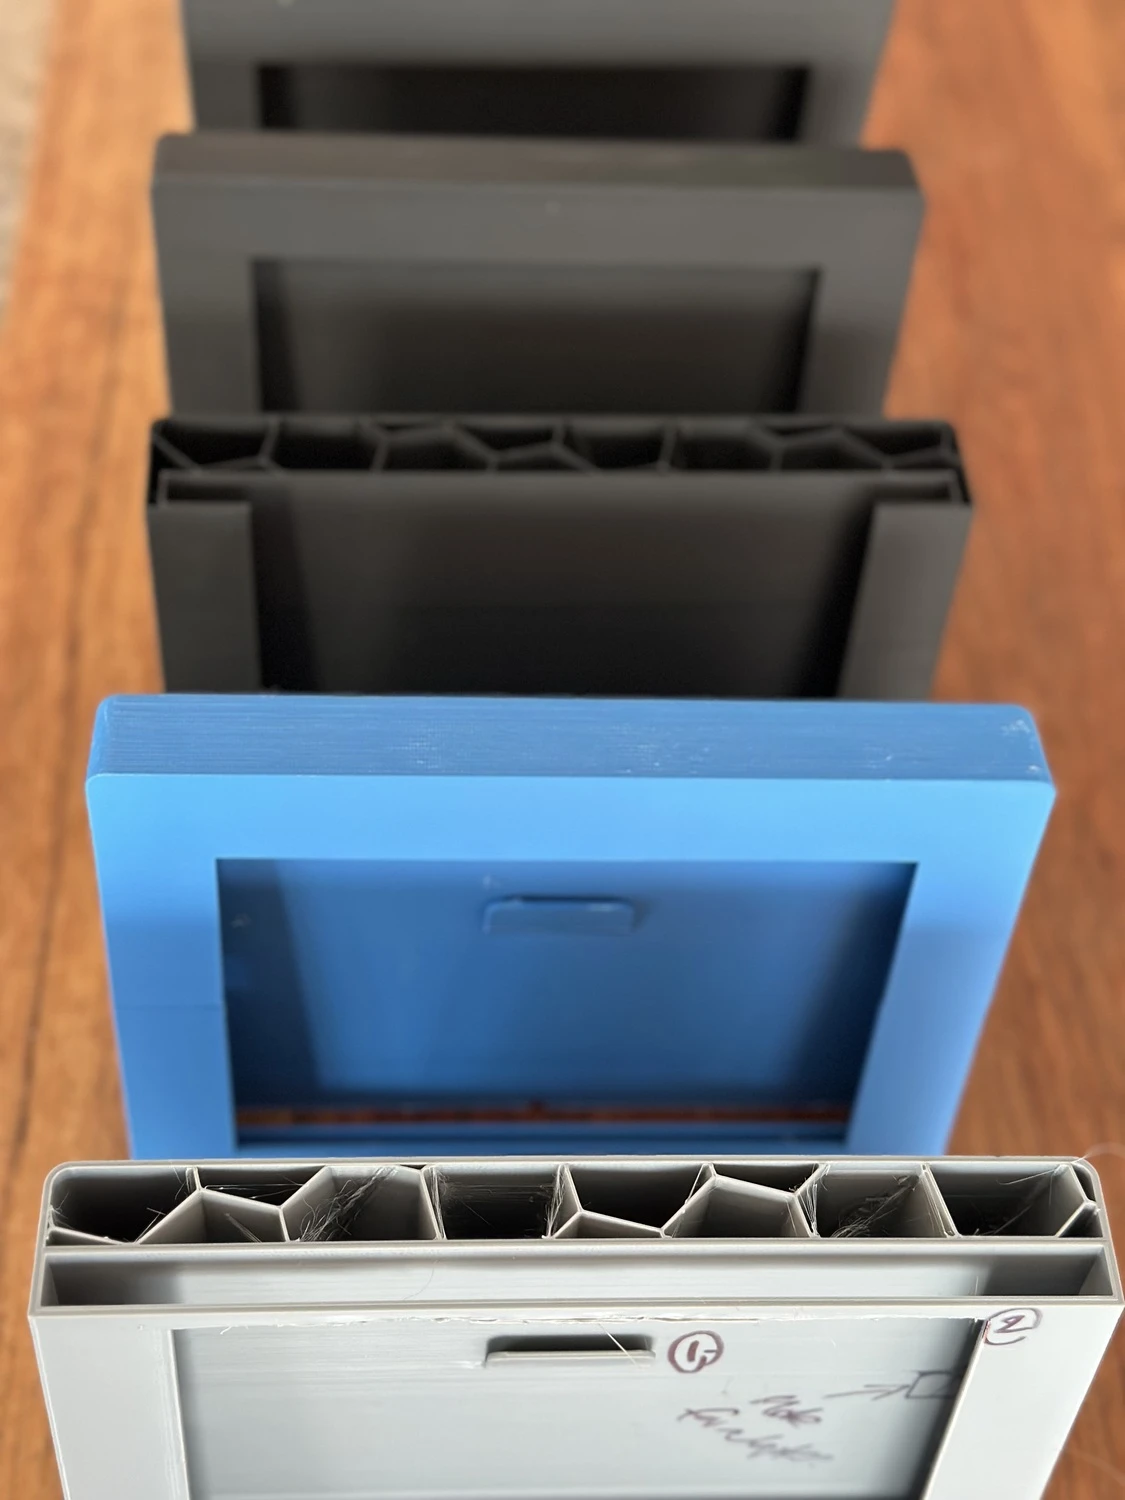
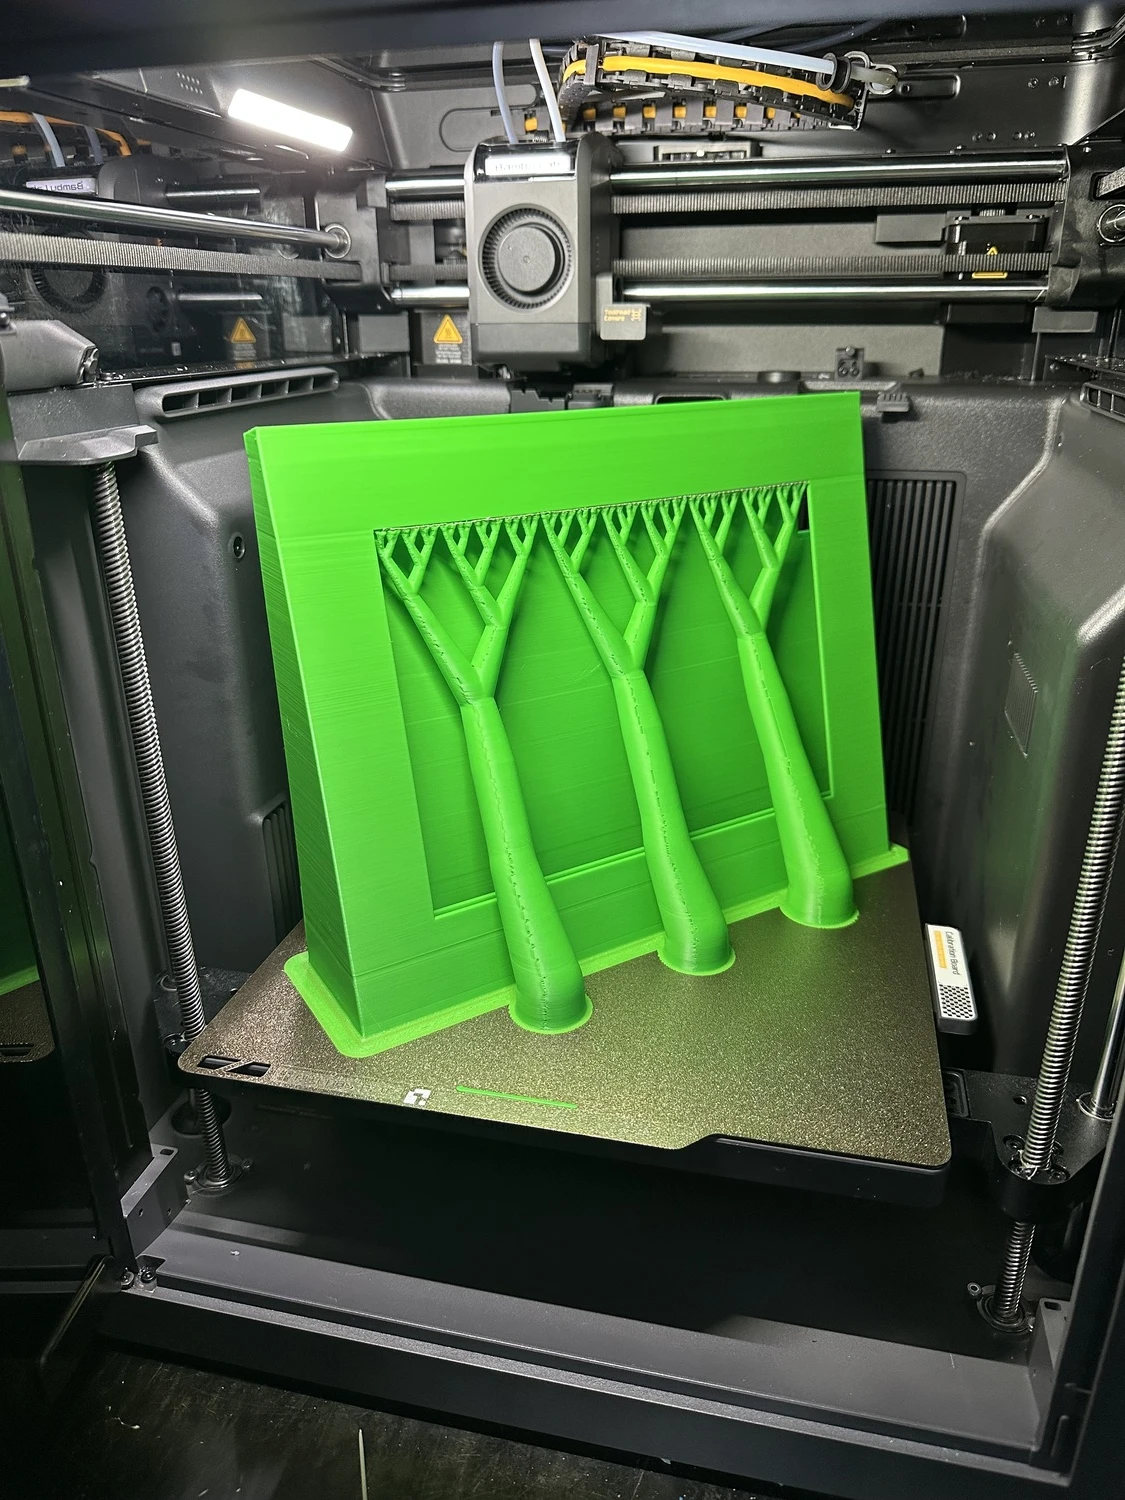
Here's some photos of the build process, which largely started with measuring an iPad, measuring its screen, then figuring out how to make something that was as simple and efficient as possible to print.
The main thing I learnt here was that every print, even if incomplete can teach you something.
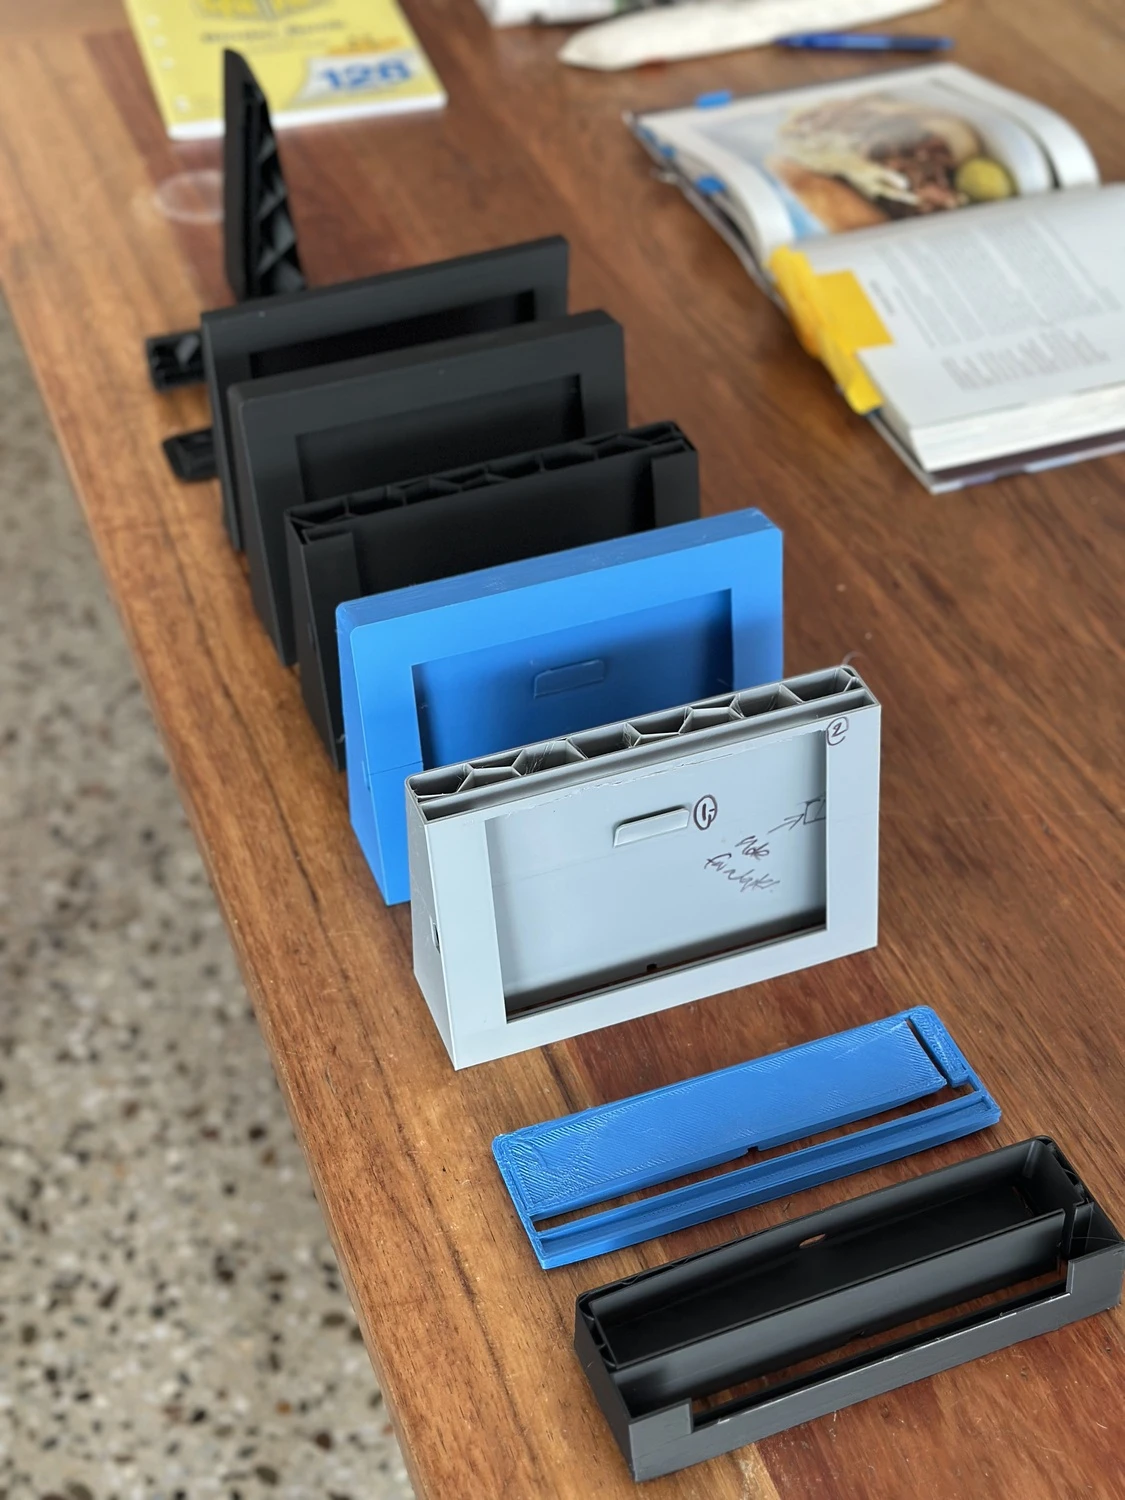
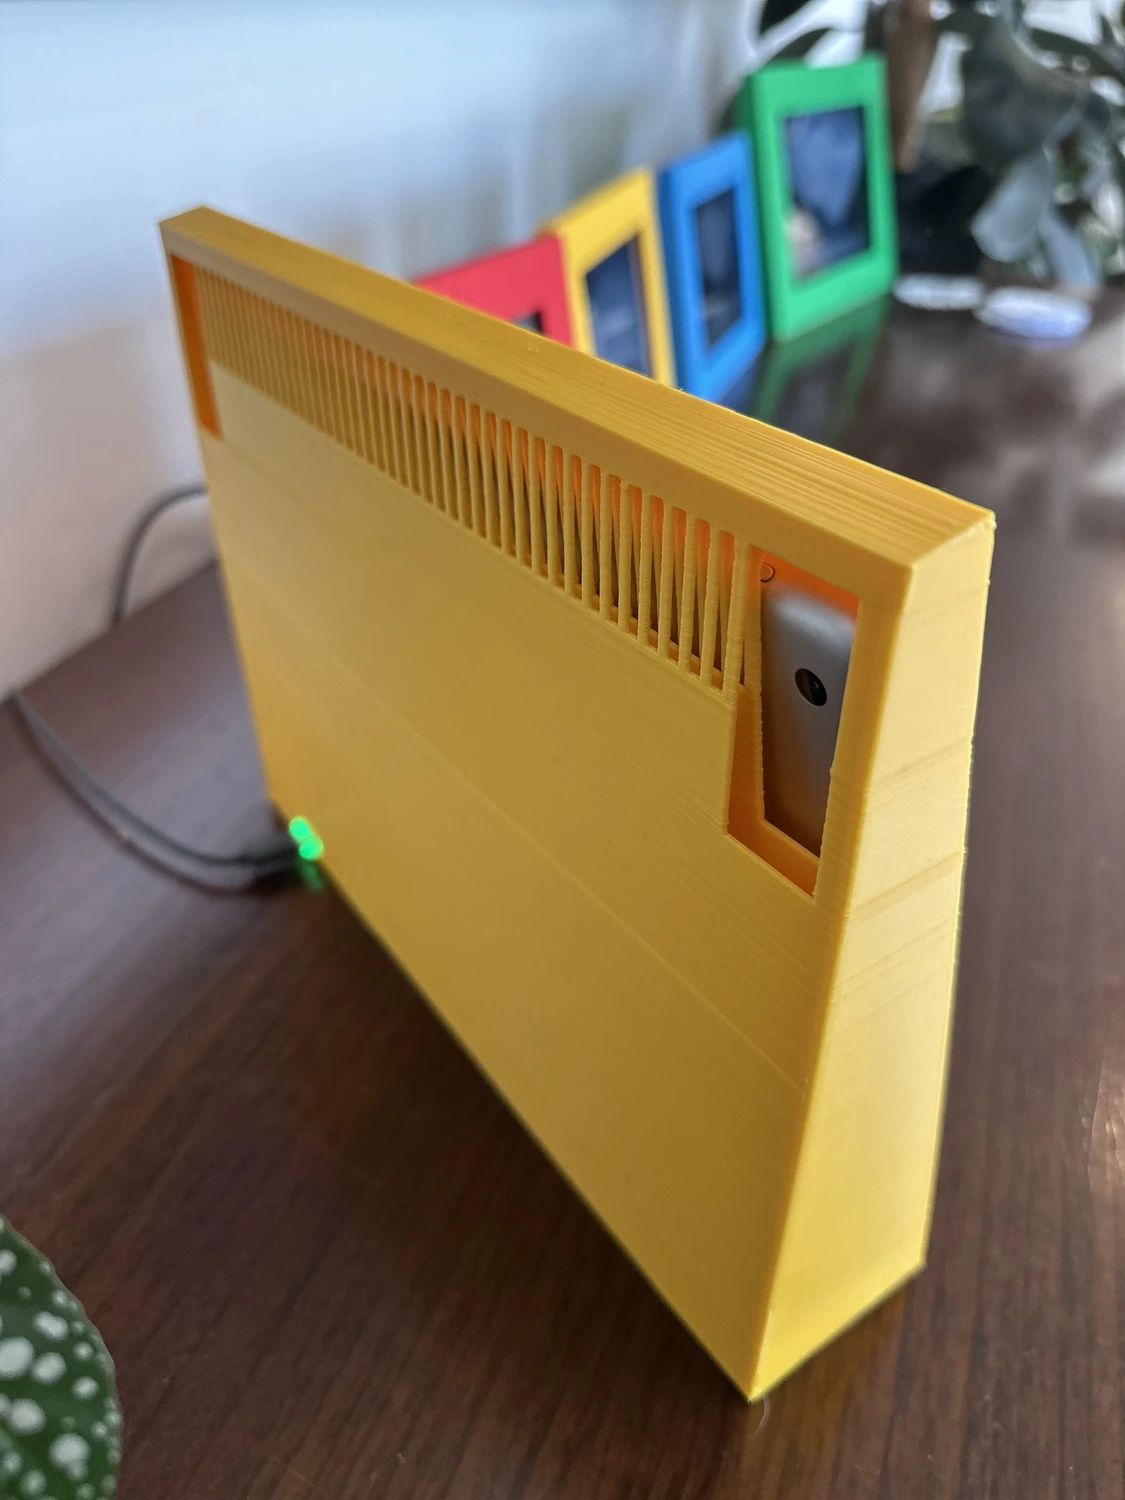
I ended up making at least 30 exports to try over about 2 months, tweaking everything from the size of the entry slot, the depth of the tray the iPad would slot into, the frame aperture for the screen and even eventually adding vents and space to get the power button from the back of the frame.
They finished up pretty nicely and I was able to find some inexpensive cork sheets to line the base with which make them nice to move around.
Supplying power
With the the shape of the stand working, I needed to solve for power. One of the biggest problems with using iPads as frames is that even the smallest power cables jut out from the side quite a distance, making it so that you either needed to seriously bend the cable or take power cords in from the side of the piece. I didn't want this, so decided I'd need to make my own.
Fortunately, I was able to find some really slimline lightning adapters on Aliexpress which I could then solder to a USB-C connector. A few small tweaks to the model later and this meant I could use a more modern power plug to feed the frames from a multi-port charger.
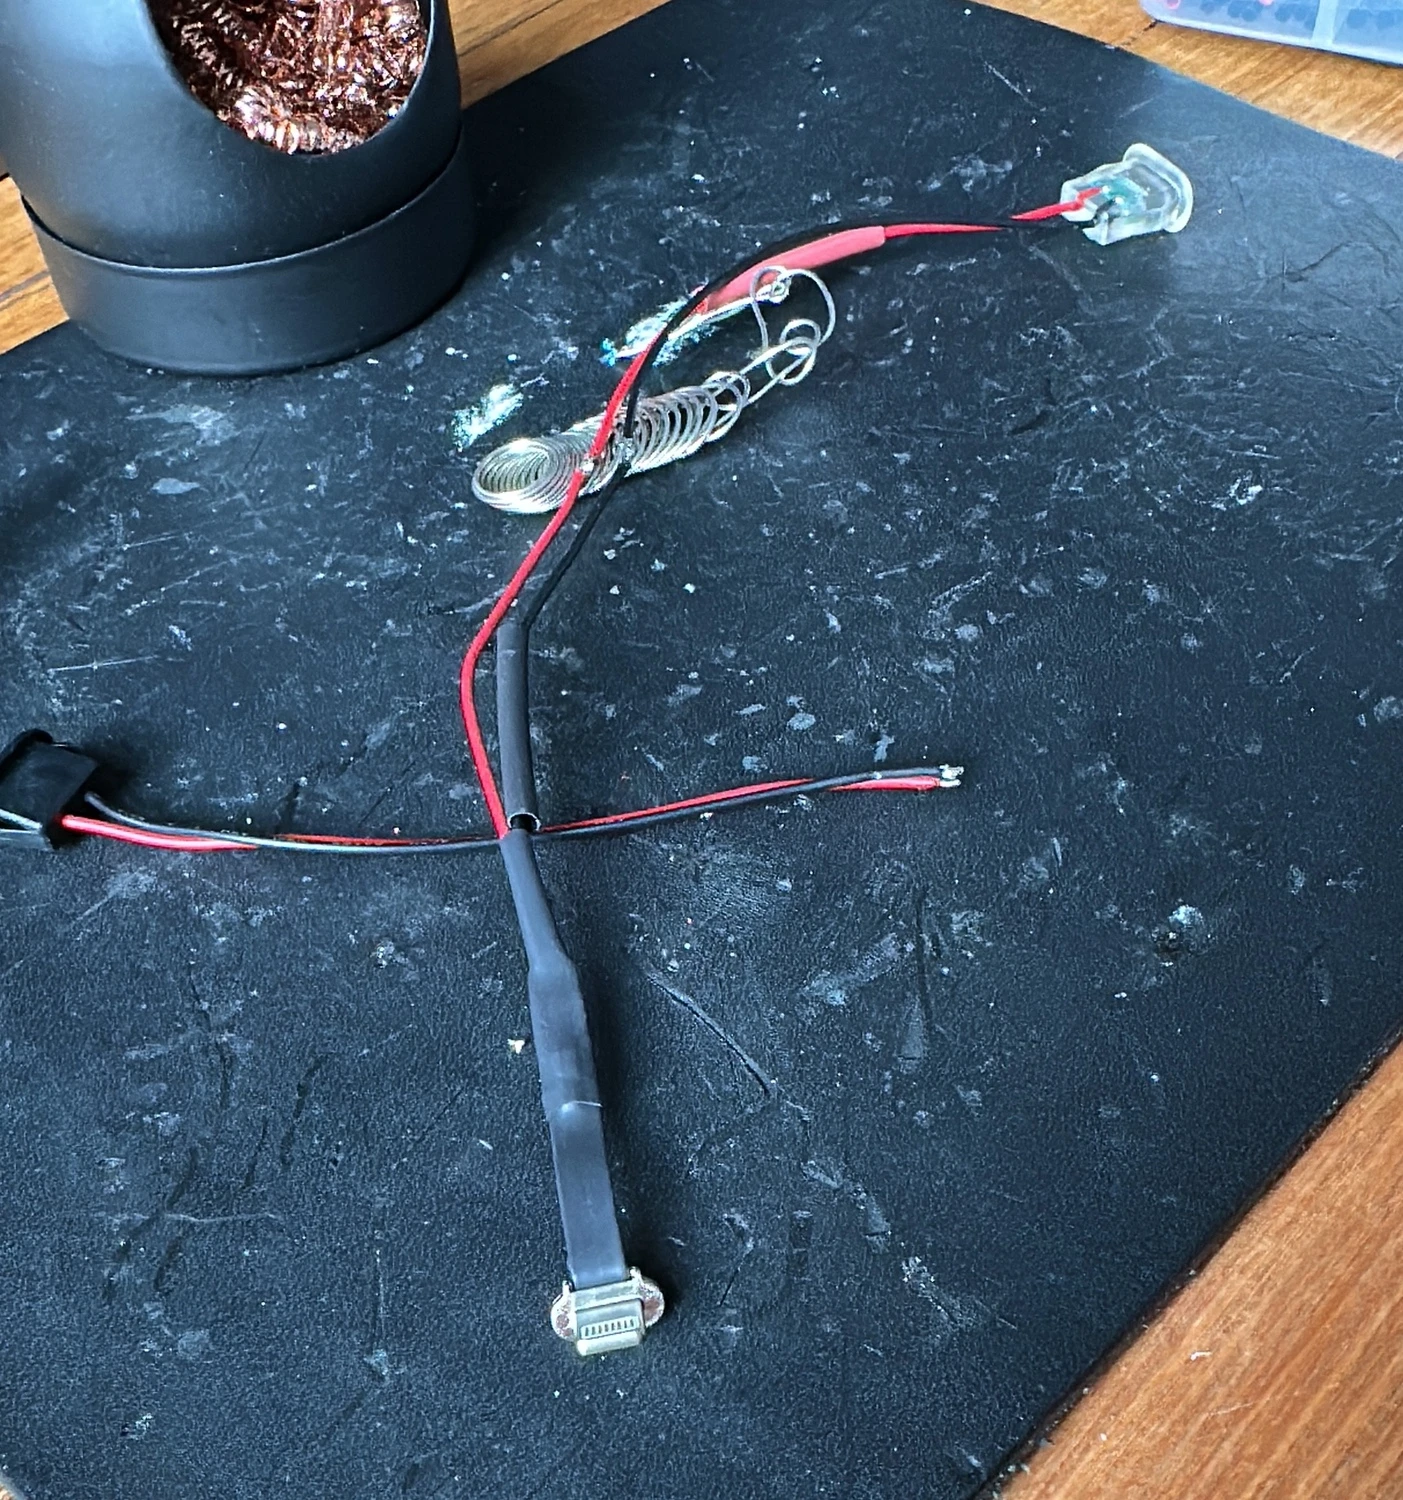
A word of caution: the larger iPads need to draw about 7-15W to stay on all the time, so you'll need to ensure that both the cables you use and also the chargers you use can supply this. A gotcha I found with some multi-port chargers is that they might allow some outputs to supply more than this, but that when you have several plugged into one PSU, some can't output enough to keep things on the whole time. I since swapped to a UGREEN 200W USB C Charger which seems to be keeping up and gives me a bit of room for expansion if I come into possession of more iPads. Interestingly, sometimes the problem can also be that the cable can't support 15W either so a bit of trial and error was required.
Making the controller and displayer app
So after focusing on getting the frame shapes right over a few months, I was excited to slot in a test ipad, turn the frame on, and use one of the many existing projects where people had built "frame" specific extensions to Immich. Unfortunately, it turned out that many of these projects are built using more modern web technologies and just show a blank screen when you try and show images on an older iPad. On a newer iPads they work fine, but I was looking to use what was already essentially e-waste, so I'd need an alternative solution
Thanks to the Immich API and some vibe coding, I was able to build something far more comprehensive and useful than I'd seen previously.
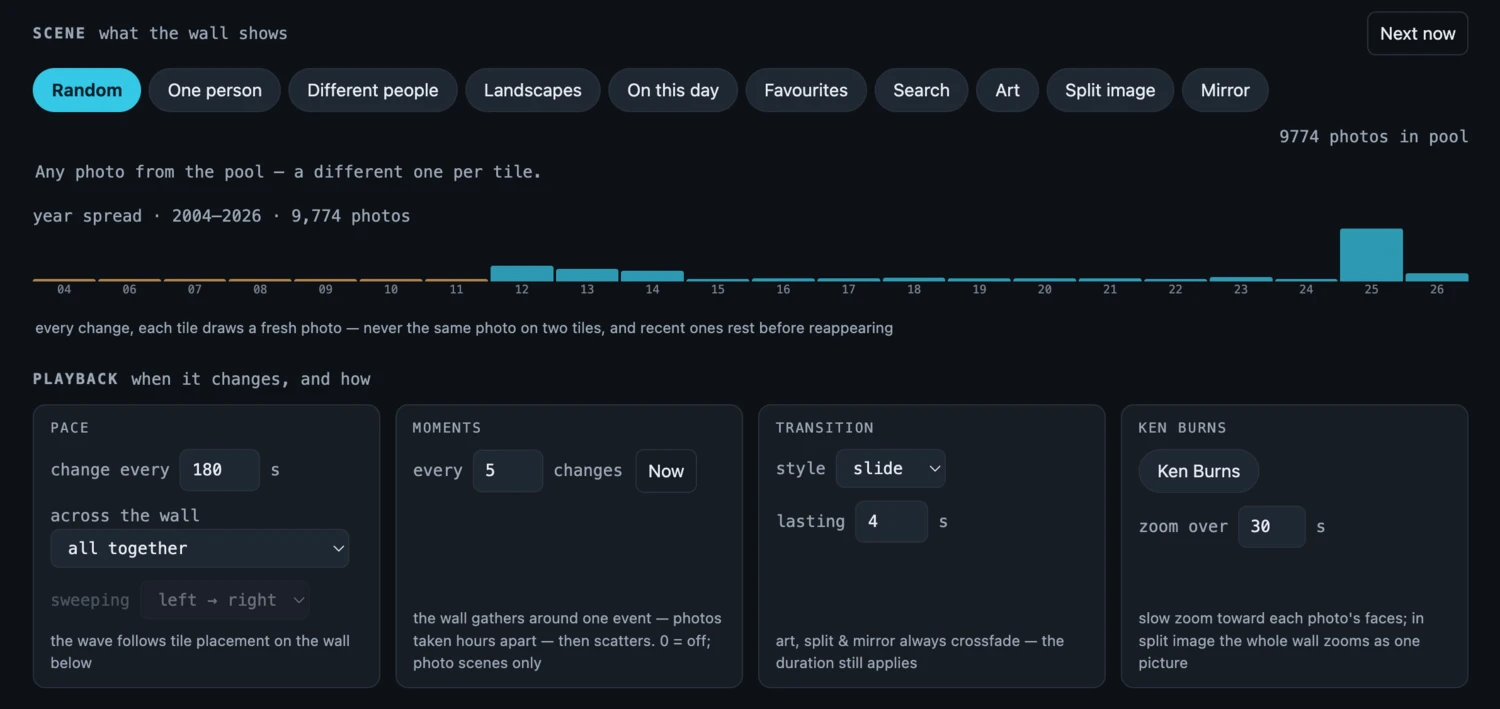
What I ended up with was a frame server I could run on the same machine hosting my immich docker containers, which made a "tile" view available for each iPad as well as an "admin" view that allowed me to change settings across all ipads.
Even better, much like the way you can arrange displays on a mac, the sever allows me to position the iPads in software, opening the door to new effects that, for example, show a single image split across multiple displays or allow for images to refresh in a wave.
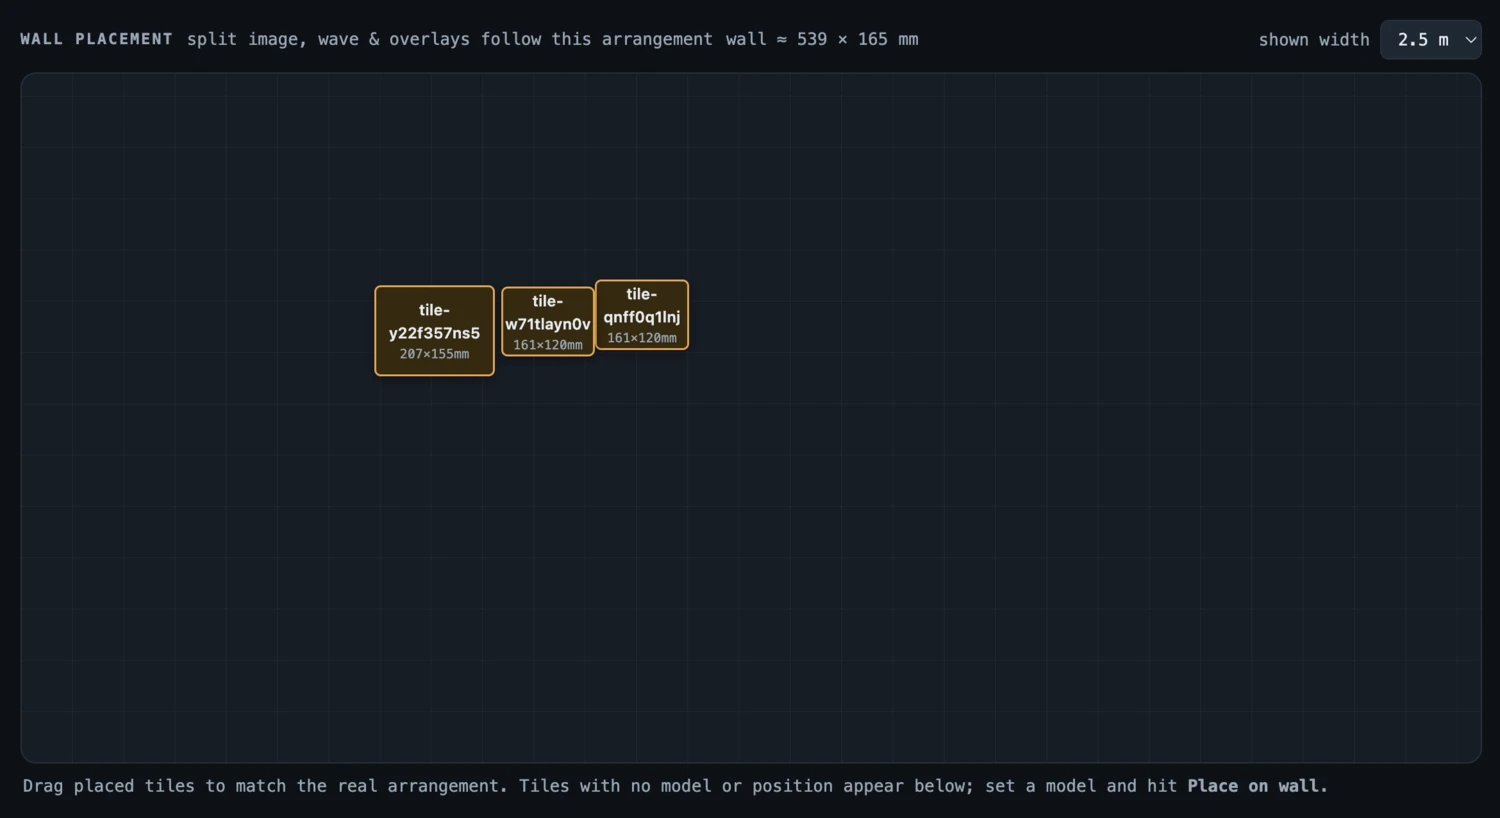
The server also has several modes, which, when coupled with Immich's excellent face recognition and person identification, have been really useful.
- Random: Just show me random photos
- One person: Show me photos of one person
- Different people: Show me photos of certain detected people
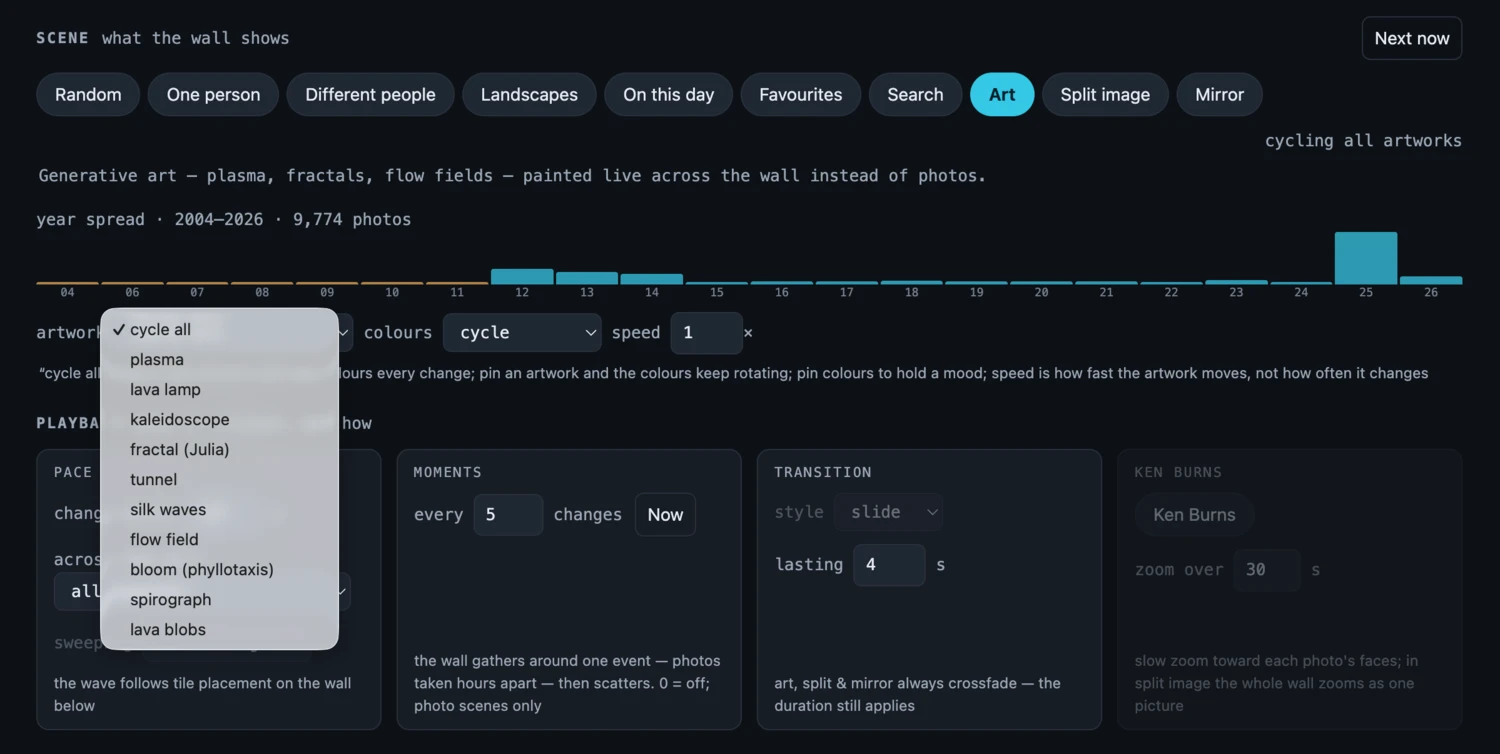
- Art mode: Show art effects (nice when you want a break from photos)
- Favourites: Show me Immich favourites
- Search: Show me results from a search (Immich has local LLM-based insane photo analysis)
- On this day: Photos from the same day over time
- Split image: Shows random photos, but split over the cluster of images
- Mirror: Eventually, I want to add a webcam into the mix and use the cluster of photos as a split mirror.
I've enjoyed some of the art effects, however I'm yet to get the frames showing the sorts of intense psychedelic visuals I'm chasing. I think this may require getting into video display as these look computationally expensive to render.
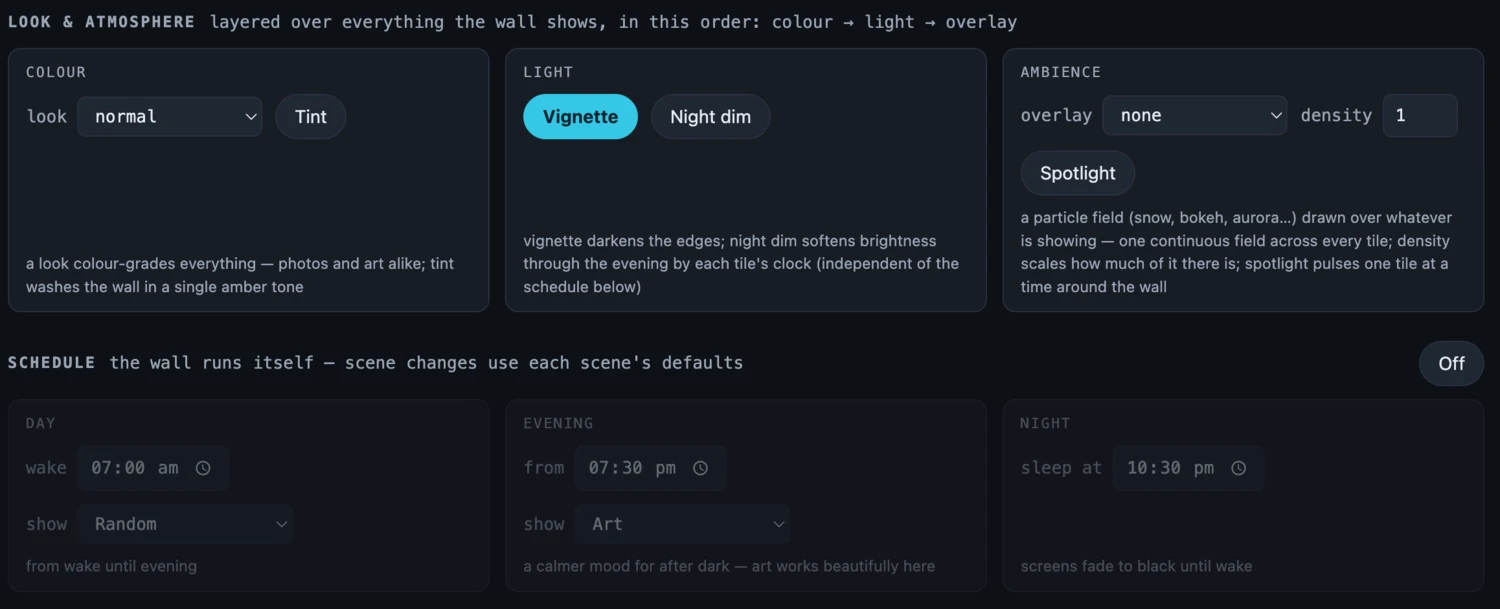
There are also little options to apply subtle visual effects to photos, whether that's making them black and white, sepia or just adding a vignette over the corners to make them all feel more consistent. There's also a schedule feature to change modes as required.
Interestingly, the hardest part of building the software so far has been getting a nice distribution of photos from across the library, especially when limiting to specific people. There's some interesting problems in this space around how when to show whom from when across time when several people are selected. I'm glad we have AI to help with this sort of puzzle tbqh.
If you're interested in the companion frame app, you can download it on my github. PRs for improvements welcome.
Finding needles in the haystack
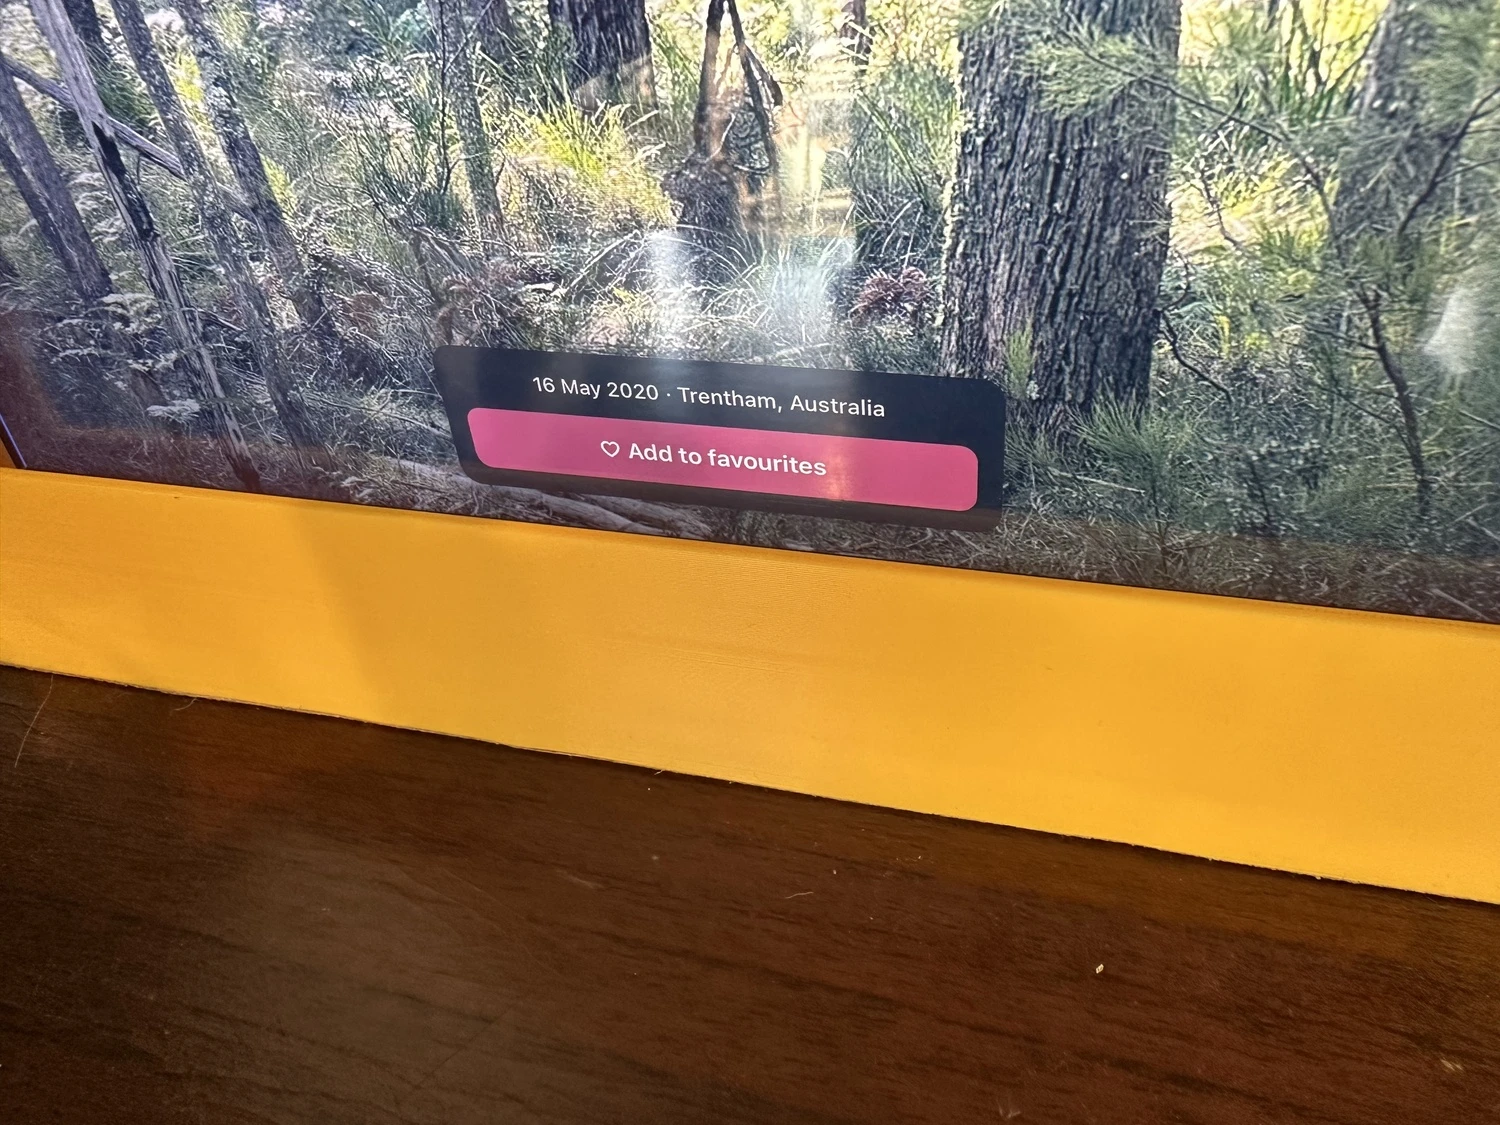
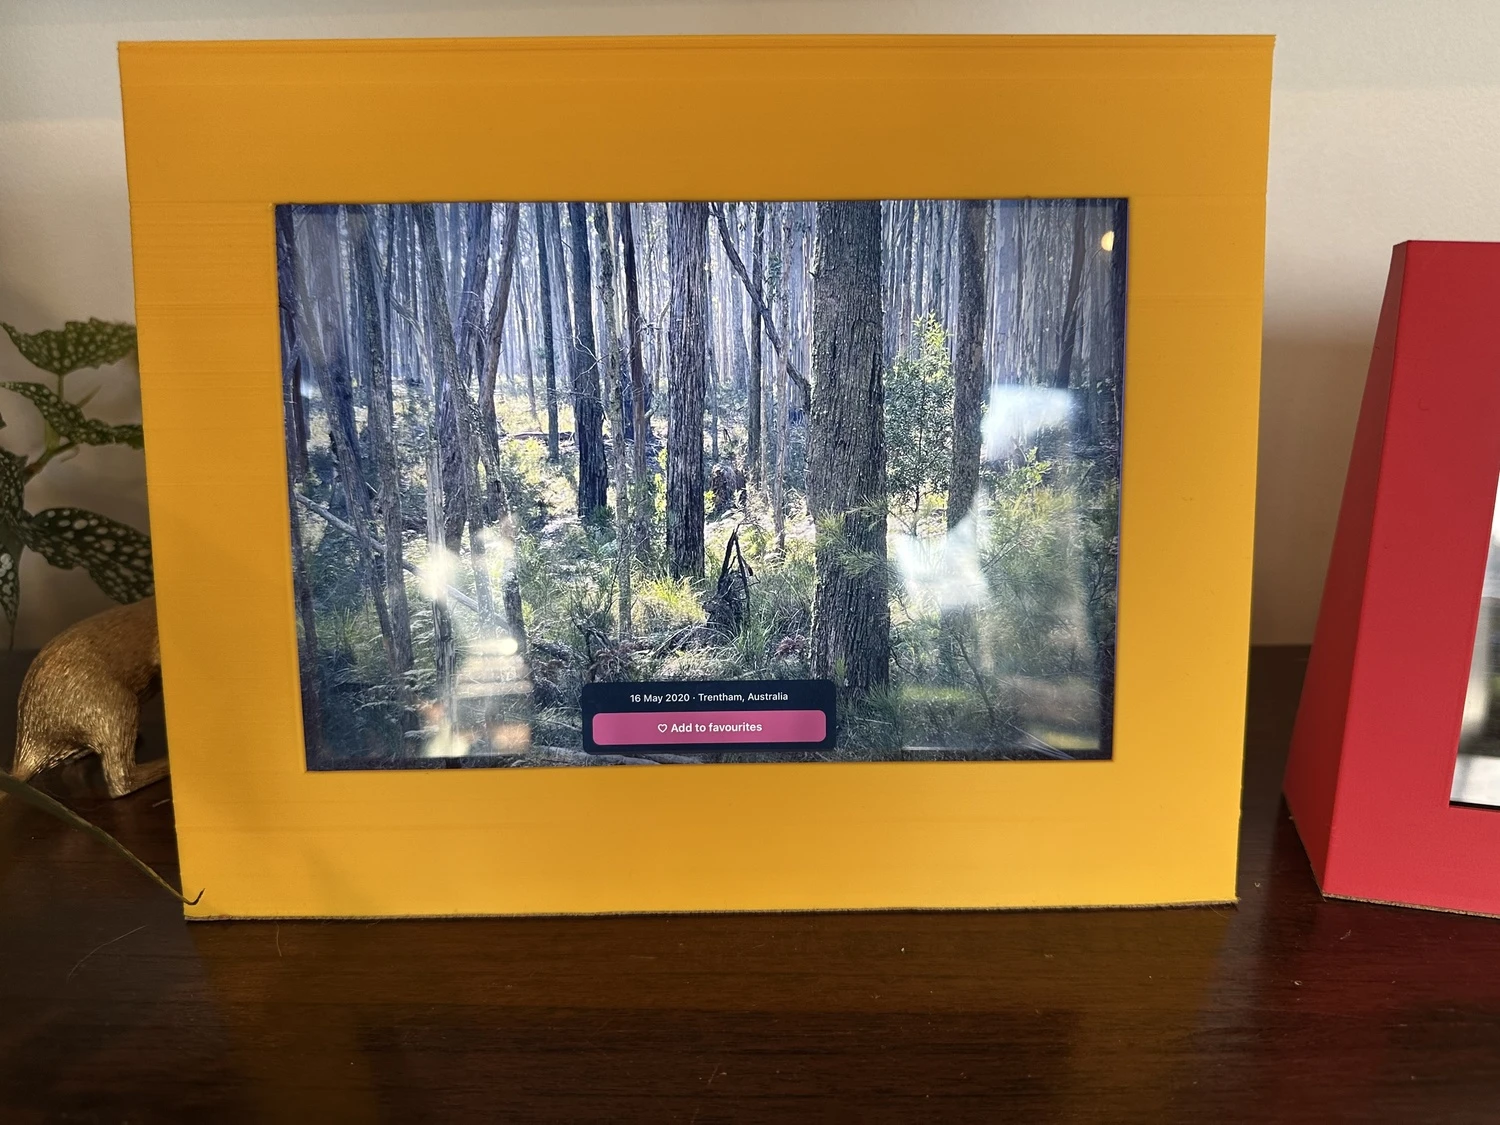
One of the best parts of building something yourself is that you can make it do whatever you can imagine. Given we have so many great photos, curating an album of absolute favourites can actually be really tricky. Now though, with 6 iPads and several old iPhones showing photos from the same immich library, it's been trivial to add a feature that allows people watching the tiles to tap once, then add to a new "Frame favourites" collection. My hope here is that this grows over time.
Some settings tips
Having the images change less frequently makes them less distracting, and arguably better for the long haul. If you do decide to try and use the repo, I'd recommend increasing the length of time that an image stays put for. This means you're able to appreciate images as they come up and, importantly, don't feel the need to keep watching for the next one.
Setting up ipads
I didn't realise this when I started, but the best set up I've found for the ipads is to make it so that:
- they aren't signed in with an apple ID
- they aren't set up with a passcode
- they are set at full brightness but your preference my be different
- under display settings, auto-lock is set to "never" instead of a time limit.
This means that the only thing you need to do to get them working is to visit the URL of your server, ideally using a static IP address, then "Add to Home Screen" on the ipad. This allows the app to open full-screen without any browser chrome and away you go.
I think I'd love to investigate adding a matt film to the ipads over time to see if this makes them more "print" like and less "screen-ish". Recommendations welcome.
Next steps
I never intended to make frames that were self-standing. Instead, I actually had big plans to keep rolling with the original caddy idea and use that to try and replicate a physical photo wall we have in our house (with probably about 60 frames in it). This would require building out some sort of way of mounting several iPads on the wall, hiding cables and also hiding a power source somewhere. For now, I think I'll park this idea, but might come back to it some day.
Enjoy!
A gallery of prototypes
Keep reading

I'm Paul. I document what I make, work on and think about here — I hope something here was useful.